
Author: Bernard Maddox

Understanding Your HVAC System

MASON HEATING AND COOLING

HEATING AND COOLING helps you avoid costly repairs and achieve better energy efficiency. It’s also important for keeping your home comfortable.

Your heating and cooling system consists of several components that work together to maintain your preferred temperature settings and balance humidity. We’ve broken down the basics to help you understand how these parts operate and interact:

Thermostat

The thermostat is the key to ensuring your home stays comfortable all year round. It allows you to set your desired temperature, and the HVAC system will turn on and off to keep it that way. A problem with the thermostat can cause your heating and cooling to work harder than necessary, leading to poor performance and higher energy bills.

Thermostats come in a variety of types, from electromechanical units that use bimetallic strips to digital, programmable models with digital displays and sensors. Regardless of the type, they all operate in essentially the same way. When a thermostat senses a shift in air temperature, it triggers action by closing or opening an electrical circuit. This circuit is closed when the air temperature falls below your set point, and it opens when the temperature rises.

Once the thermostat triggers a heating cycle, the furnace or heat pump kicks in to warm your home. The blower fan moves conditioned air through your home’s ductwork, and it exits into rooms via supply vents or registers. In systems with whole-home air filtration, the evaporator coil also pulls spent air from each room through return vents or registers. These airways route the spent air back to the evaporator coil, where the refrigerant absorbs the heat and sends it outdoors.

Digital and programmable thermostats use a sensor to detect small changes in temperature. When the sensor reads a deviation from your preferred setting, it closes an electric circuit to activate the HVAC system. The programmable models allow you to set different schedules for the weekday and weekend. Using these settings can help you save up to 30% in energy use.

Thermostat technology continues to evolve. Some models are Wi-Fi compatible, allowing them to communicate with your HVAC equipment through your home’s existing router. Some offer a remote-access app for convenient control from your smartphone or tablet. If you’re thinking about replacing your old thermostat with a new, smart model, it’s best to replace your HVAC unit at the same time. This will ensure compatibility and maximum efficiency. Otherwise, you may find yourself paying more for your new thermostat in the form of higher energy costs and shorter equipment lifespans.

Furnace

Your HVAC system’s furnace specializes in warming your home during the winter. When your thermostat detects that indoor temperature has dropped below its set point, it sends a low-voltage signal to the furnace to power on. This opens a gas valve, allowing natural gas to flow into the burner chamber. The flames from the burner heat a metal heat exchanger, which then circulates warm air through your house’s ductwork and out into each room through vents.

Furnaces typically use either gas or oil to operate, although they can also be powered by electricity in certain models. If your home has a gas furnace, you’ll need to maintain a propane tank or natural gas line outside of your home. Electric furnaces use a combination of heating elements and blower fans to draw in air and force it over the heater’s coils or heat exchanger. The blower motor then circulates the warmed air throughout your house’s ductwork and out through each room’s vents.

In some homes, your furnace and air conditioner are combined into a single unit that both heats and cools. A split-system HVAC system has separate outdoor and indoor units. Both systems share your home’s ductwork to distribute heated or cooled air, depending on the season. This arrangement is common in Florida, as the climate often allows for both heating and cooling year-round.

A gas or electric furnace, paired with an AC unit or heat pump, can make your home comfortable in the winter and summer, respectively. The AC or heat pump functions similarly in both seasons, pulling air in from the outdoors and circulating it over its evaporator coils to remove humidity when cooling or over the heat exchanger when heating. When you’re replacing your AC or furnace, be sure to replace the other unit at the same time to maximize efficiency and avoid compatibility issues. Purchasing one unit separately may require the addition of new ductwork to accommodate a different configuration or may result in poor performance when that particular component is replaced. It’s important to work with an experienced HVAC partner to ensure your new system is compatible with your current ductwork and sized appropriately for the best results.

Evaporator Coil

The evaporator coil is the AC component responsible for absorbing heat from your home’s air, which it does together with the compressor and condenser. The evaporator coil is located inside your home’s air handler, usually paired with your furnace or found within your fan coil unit (where it’s sometimes installed in a dedicated mechanical room). The evaporator coil consists of an A-shaped web of tubes filled with cold refrigerant. The blower fan from your indoor air handler blows warm air over the coil, which causes the evaporator coil to absorb the heat. During this process, the liquid refrigerant in the coil transforms into water vapor, cooling the air as it passes over the evaporator coil and releasing moisture in the form of condensation.

A properly working evaporator coil allows your AC system to efficiently transfer heat, which reduces energy usage and lowers your energy bills. This is possible thanks to the evaporator coil’s ability to convert liquid into a gaseous state, enabling it to absorb and transfer thermal energy more effectively than other types of heat exchangers.

In order to perform correctly, the evaporator coil must have a number of factors working in tandem – including its distributor nozzle sizing, circuiting configuration, and fin density. Distributor nozzle size is critical because it must be just right to ensure that the liquid refrigerant is at the ideal flash (boiling/phase change) temperature during each cycle of the refrigeration cycle. The evaporator coil’s circuiting design also needs to be in the optimal configuration to enable the refrigerant to move quickly through the system, allowing it to achieve the necessary pressure drop.

Finally, the evaporator coil’s fin density needs to be in the optimal configuration to allow it to reach the flash temperature in the shortest amount of time. This is why the evaporator coil’s design requires careful attention to detail. When the evaporator coil is clogged or dirty, it can restrict airflow and prevent the system from cooling your home effectively. If your evaporator coil isn’t performing well, it may be time to consider professional cleaning or replacement services from an HVAC contractor.

Ductwork

The ductwork is the circulatory system of an HVAC setup, transporting both conditioned and unconditioned air throughout living spaces. This network of passages, crafted from materials like sheet metal and flex duct, ensures consistent airflow to every room. Like veins and arteries distribute blood to all corners of the body, return and supply ducts move both incoming and outgoing air to prevent hot and cold spots and ensure even temperature distribution.

A duct system is made up of pipes, trunks, take-offs, turning vanes, cleats, and specialized connectors that connect a home or business’s ductwork to the HVAC unit. Duct pipes are usually insulated to prevent heat loss or gain and reduce energy costs.

Your HVAC system works best when its components are well-maintained. Changing the air filter regularly, yearly duct cleaning, and routine maintenance can help keep your heating and cooling system running optimally.

Leaks in a duct system can significantly reduce the efficiency of an HVAC system. Having a duct inspection done by an experienced HVAC technician can help pinpoint any problems that could be contributing to poor performance and air quality issues.

It’s also important to have your ducts properly installed and properly sealed. Unnecessary holes or leaks in a duct can increase your energy bills, lead to inconsistencies between room temperatures, and reduce indoor air quality.

Air ducts are a crucial part of an HVAC system, but they’re also one of the most neglected parts of the system. Dirty ducts can collect dust and allergens, which contribute to allergies and respiratory conditions. Additionally, a poorly located or blocked air vent can force your system to work harder, increasing wear and tear and shortening its lifespan.

The biggest signs that you have a dirty duct system are inconsistent room temperatures, high energy bills, and noises like whistling or rattling. A ductwork inspection and regular maintenance by an experienced technician can greatly improve your HVAC system’s performance, save you money, and improve your home’s comfort.

When to Call a Professional Painter Instead of Doing It Yourself

Highlands Ranch CO Painters

Highlands Ranch CO Painters reduces project costs by eliminating unnecessary rework. Pros provide efficiency, expertise, and high-quality finishes that increase long-term value.

During the estimate process, ask contractors to provide references and testimonials. Reputable painting contractors also typically offer a warranty on work and materials.

Request quotes that itemize prep, repairs, materials, labor, and cleanup. This improves quote accuracy and supports informed comparisons.

1. You’re Not an Expert

A quality paint job transforms spaces, adding value and beauty that stands the test of time. Yet, the subtle qualities that distinguish professional craftsmanship are often overlooked. Understanding the indicators of high-quality painting allows homeowners to recognize professional workmanship, assess their own painting skills, and communicate effectively with contractors about any concerns.

Hiring a professional avoids the costly mistakes that can result from DIY efforts. Relying on a pro to purchase the best products, take care of proper preparation, handle dangerous tasks such as power washing or ladder work, and provide efficient cleanup helps homeowners save time and money. A good painting contractor also offers access to bulk purchasing and trade discounts that further reduces costs.

When evaluating painting contractors, ask for references from previous clients and examine the work they’ve completed in person. Pay special attention to the transitions where different colors meet and the overall consistency of color density and texture throughout the job.

Homeowners should also verify the painting contractor’s commitment to responsible environmental practices. This includes sourcing low-VOC and advanced formulations, limiting waste through product consolidation, utilizing recycled solvents and other resources, and providing documentation for hazardous waste disposal.

When choosing a professional, look for an estimate that clearly outlines labor and materials to prevent unexpected expenses. Having a clear understanding of the painting process allows homeowners to compare quotes and select the contractor that provides the best value for their project. Detailed estimates also ensure that a homeowner is aware of any additional charges for furniture moving, cleaning, and other services.

2. You’re Trying to Save Money

A fresh coat of paint can dramatically transform a space and increase your home’s value, but it can also be expensive. Hiring a professional can help you stay within your budget without sacrificing quality and prevent damage from improper techniques and tools.

Many homeowners are surprised by the amount of work that goes into repainting a room or entire home. It’s not as simple as opening a can of paint and going to work, and many homeowners abandon DIY projects due to frustration, time constraints, or the need to do extensive repair work. Hiring a professional may cost more upfront, but they save you the cost of materials and labor costs for rework or repairs down the line.

In addition to saving you the time and hassle, professional house painters are often able to complete jobs in half the time of DIY projects. Their team-based approach maximizes productivity, and their expertise ensures that projects run smoothly and efficiently. Their specialized tools and equipment enable them to achieve results that aren’t possible with traditional DIY approaches.

There are a number of ways to save money on painting projects without cutting corners or compromising quality. Start by assessing the scope of your project and choosing a color palette that fits your style. Then choose the areas of your home that most need attention, and focus on them first. For example, skip ceilings and trim if they’re still in good shape, patch holes, and move furniture before painting (and hire pros for difficult spots like cutting in). Use online paint calculators or consult a painting contractor to estimate exact amounts of paint needed to avoid waste, and shop sales events to get the best prices.

3. You’re Not Sure What You’re Doing

It may seem like a good idea to save money by painting your home yourself, but the reality is that it’s not always worth it. A professional painter has the knowledge and tools to help you get a high-quality, long-lasting finish. They also have experience in a variety of different situations, such as exterior surface preparation and weather conditions, as well as specialty finishes, like faux or textured paint.

The best place to start in your search for a painter is with friends and family who have recently had their homes painted. If they were pleased with their experience, ask them who they hired and if they would recommend them. You can also check out online reviews on sites like Google and Yelp to learn more about the reputation of potential contractors.

During your appointment to receive an estimate, be sure to interview the contractor thoroughly. A reputable painting contractor should be willing to answer any questions and provide you with a detailed, clear project scope of work. In addition, they should be able to break down the cost of the job into direct and indirect costs.

A thorough assessment of your project will allow the painter to accurately determine how much labor, materials, and equipment are needed to complete the job. You should also ask the painter how they handle unforeseen issues, including rot and structural damage.

A good painter will take the time to carefully mask or protect areas not being painted and ensure that hardware that opens and closes is functional. They will also ensure that the trim and moldings are clean and even, with no bare spots or excessive buildup.

4. You’re Not Comfortable With Your Tools

A fresh coat of paint can transform a room, but it’s not as simple as just opening a can and getting to work. In fact, painting is a complex process that requires special equipment and expertise. Trying to do it yourself could lead to expensive mistakes and a poor result. If you’re not comfortable working with your tools, it’s time to call a professional.

A professional painter will have the right tools and equipment to get the job done quickly and correctly. Plus, they will know how to prep the surface and apply the correct coat of paint to ensure a smooth finish. This will save you a lot of time and money in the long run.

Another important question to ask is, “Do you have references?” A reputable painting company will be more than happy to provide past clients. This is a great way to see the quality of their work and their level of satisfaction.

When looking for a paint contractor, it’s also a good idea to ask about their insurance coverage. This is not only a legal requirement, but it protects both you and the painter in case of an accident during the project.

In addition, you should also inquire about the length of the project and how clean they will leave your home afterward. A good painting company will be transparent about their timelines and expectations, which can prevent misunderstandings down the line. Additionally, they should be willing to adjust their timeline if something unexpected comes up.

5. You’re Not Sure What You’re Doing

A new coat of paint can add a fresh look to your home without major renovations. However, it can also be messy and time-consuming. Unless you have plenty of time and the right skills, it’s usually better to let a professional take on your painting project instead of trying to do it yourself.

Choosing to do it yourself can be expensive and lead to costly mistakes. Even if you are careful, it’s easy to accidentally splatter your new sofa or use the wrong finish on a high-traffic area of your home. In some cases, these mistakes can require extensive and costly repairs.

Professional painters are experienced and have the proper training to ensure safe work practices. They follow ladder safety guidelines and have the equipment necessary to complete large projects like interior and exterior house painting. Additionally, painters are trained to properly mask detailed trim and protect other areas from paint drips, overspray, and splatter. They can complete your project in a timely manner and offer a satisfaction guarantee, so you know your work is done well.

Finally, a good paint job requires meticulous prep work. Professional painters know how to repair surface damage, properly sand, and prime surfaces to ensure the highest-quality paint finish that lasts. They will also apply a smooth, even coat and pay attention to detail. To judge a quality paint job, examine it in different lighting conditions to see how it holds up under different light sources.

Painting your own home can be a rewarding experience, but it’s not for everyone. Hiring a professional painting company will ensure your project is completed correctly, safely, and efficiently so you can enjoy the results for years to come.

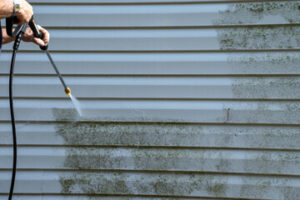
Vinyl Siding Cleaner: Keeping Your Home’s Exterior Spotless and Durable

Vinyl siding has become one of the most popular choices for residential exteriors, and it’s easy to see why. Its durability, affordability, and low-maintenance characteristics make it a preferred option for homeowners seeking both practicality and aesthetic appeal. However, even the most resilient siding is not immune to dirt, grime, mold, and environmental pollutants. Over time, these elements can accumulate, dulling the appearance of the home and, if left untreated, potentially causing damage. This is where Vinyl Siding Cleaner comes into play. Proper use of these products ensures the longevity, beauty, and protection of vinyl siding, making it an essential component of home maintenance.

pressure washing

Why Regular Cleaning Matters

One of the main reasons homeowners invest in vinyl siding cleaners is to maintain the visual appeal of their property. Dust, pollen, and air pollution gradually form a layer over the siding, causing it to look aged and worn even when the underlying material remains in excellent condition. Beyond cosmetic concerns, organic growth such as mold, mildew, and algae can thrive in shaded or damp areas, leading to unsightly streaks and potential surface degradation. Regular cleaning with a suitable vinyl siding cleaner removes these contaminants effectively, preserving the siding’s original color and texture.

Furthermore, routine cleaning plays a preventative role. When debris and growth accumulate, they can retain moisture, increasing the risk of warping, staining, or even the weakening of siding panels over time. Using a quality vinyl siding cleaner helps protect the structural integrity of the exterior, reducing the need for expensive repairs or early replacement. In short, maintaining a consistent cleaning schedule is an investment in both aesthetics and long-term durability.

Choosing the Right Vinyl Siding Cleaner

Not all cleaning products are created equal, and selecting the appropriate vinyl siding cleaner is critical to achieving optimal results. Many household cleaning agents may be too harsh or contain chemicals that can discolor or damage siding. Professional-grade vinyl siding cleaners are specifically formulated to remove dirt, mold, mildew, and algae without harming the surface or surrounding landscaping.

When evaluating cleaning products, it is important to consider the following characteristics:

  1. Surface Compatibility – Ensure the cleaner is designed for vinyl siding and won’t erode the material, strip protective coatings, or cause fading.
  2. Biodegradable Ingredients – Eco-friendly solutions reduce the environmental impact and minimize harm to nearby plants, lawns, and soil.
  3. Mold and Mildew Protection – Some cleaners include preventative agents that inhibit the return of algae and mildew, prolonging the intervals between cleanings.
  4. Ease of Application – A product that can be applied via sprayer or brush and rinsed efficiently saves time and ensures even coverage.

Choosing the right product helps maintain the aesthetic appeal while protecting the material from damage and prolonging its lifespan.

Techniques for Effective Vinyl Siding Cleaning

While a quality cleaner is essential, proper application techniques are equally important to achieving a streak-free, professional-looking finish. One common mistake is applying too much pressure or using abrasive tools, which can scratch or dent vinyl siding. A gentle, methodical approach ensures dirt is removed without harming the surface.

Start by rinsing the siding with water to loosen surface debris. Next, apply the vinyl siding cleaner according to the manufacturer’s instructions, often using a low-pressure sprayer or soft brush. Allow the solution to work on the surface for the recommended time, typically several minutes, to break down grime and organic growth. Finally, rinse thoroughly from top to bottom to prevent streaking and ensure that all residue is removed.

Professionals often recommend cleaning in sections, particularly for larger homes. This method helps maintain a consistent application and prevents the solution from drying on the surface before it can be rinsed. Additionally, regular inspection during the cleaning process allows for the early identification of minor issues, such as loose panels or cracks, that may require attention.

Benefits of Regular Vinyl Siding Cleaning

The advantages of using a dedicated vinyl siding cleaner extend beyond simple aesthetics. Regular cleaning enhances both the performance and lifespan of siding materials. Some of the key benefits include:

  1. Restored Appearance – Dirt, grime, and organic growth are removed, revealing the siding’s original color and finish.
  2. Preventive Maintenance – Regular cleaning helps protect against warping, staining, and material degradation caused by prolonged exposure to moisture and contaminants.
  3. Reduced Maintenance Costs – By preventing serious damage, homeowners can avoid costly repairs or premature siding replacement.
  4. Improved Curb Appeal – A clean exterior enhances the overall impression of the home, increasing perceived value for guests or potential buyers.

In addition to these practical benefits, a well-maintained exterior contributes to a sense of pride and satisfaction for homeowners, reinforcing the value of consistent upkeep.

Common Mistakes to Avoid

Even when using high-quality vinyl siding cleaners, improper techniques or timing can reduce effectiveness and potentially cause damage. Some common mistakes include:

  • Using Harsh or Abrasive Tools – Wire brushes or high-pressure nozzles can scratch vinyl surfaces, leaving them vulnerable to future dirt accumulation and damage.
  • Neglecting Surrounding Areas – Cleaners that come into contact with landscaping, mulch, or outdoor furniture may cause discoloration or harm plants if not properly managed.
  • Overlooking Shaded Areas – Mold and mildew often thrive in areas that receive little sunlight, making it essential to target these spots during cleaning sessions.
  • Skipping Protective Measures – Wear gloves and eye protection to avoid contact with chemicals, and follow manufacturer guidelines closely.

Avoiding these pitfalls ensures that cleaning remains both safe and effective.

DIY vs. Professional Cleaning

While many homeowners can effectively clean vinyl siding themselves, there are circumstances where professional services may be more appropriate. Professionals bring specialized equipment, experience, and knowledge of appropriate cleaners to handle larger properties, high elevations, or heavily contaminated surfaces. Additionally, professionals can identify underlying issues, such as cracks or loose panels, that may be missed during a DIY cleaning.

For homeowners opting for DIY cleaning, using the correct cleaner, following recommended techniques, and scheduling regular maintenance are critical to achieving the same long-lasting results that professionals provide. On the other hand, professional services offer convenience, expertise, and the reassurance that the siding will be thoroughly cleaned without damage.

Seasonal Cleaning Considerations

Timing can affect both the effectiveness and safety of vinyl siding cleaning. Seasonal factors such as temperature, humidity, and sunlight play a significant role in cleaning outcomes. For example, washing siding in direct sunlight can cause streaking or premature drying of cleaning solutions, while freezing temperatures may reduce the effectiveness of certain chemical agents. Spring and fall are often ideal seasons for cleaning, as temperatures are moderate and the buildup from winter or summer months is more manageable.

Integrating seasonal cleaning into a broader home maintenance routine ensures that siding remains in optimal condition year-round. For instance, combining vinyl siding cleaning with gutter maintenance, window washing, and exterior inspections creates a comprehensive approach that protects the property from multiple angles.

Long-Term Benefits of Vinyl Siding Maintenance

Regular use of vinyl siding cleaner not only preserves appearance but also contributes to the overall durability and value of the property. Consistently maintained siding withstands environmental stressors more effectively, reducing the risk of fading, cracking, or warping. Furthermore, a clean exterior enhances curb appeal and can increase property value, making it an important consideration for homeowners planning to sell or renovate.

Preventive cleaning also reduces the likelihood of emergency repairs, such as replacing panels damaged by mold, mildew, or algae. By investing in the proper cleaning methods and products, homeowners protect both aesthetic appeal and long-term performance, making maintenance an essential aspect of responsible property ownership.

Vinyl siding is a durable and attractive choice for any home, but its longevity and visual appeal depend on proper maintenance. Using a high-quality vinyl siding cleaner ensures that dirt, grime, and organic growth are removed safely and effectively. Regular cleaning not only restores the original look of the siding but also prevents damage, reduces maintenance costs, and improves curb appeal.

Whether homeowners choose to handle cleaning themselves or hire professionals, the key is understanding the appropriate products and techniques for vinyl surfaces. Gentle application, proper rinsing, and consistent scheduling transform a simple exterior cleaning task into a strategic maintenance practice that protects both the home’s appearance and structural integrity. In the long run, vinyl siding cleaner is more than just a cosmetic solution; it is an investment in the beauty, durability, and value of any property.

Small Bathroom Design Ideas for Compact Spaces

Small Bathroom Design

Whether you’re remodeling or just sprucing, many of the same design tricks work for small bathrooms. Look for layout ideas that eliminate collisions (like toilets abutting shower walls) and focus on function over fashion.

Light colors help a room feel bigger by reflecting light, and large-format tiles reduce grout lines to expand the visual surface. Incorporate mirrors to multiply the effect.

Colors

Whether you envision a tranquil spa-like retreat or an energetic, invigorating morning workout space, the color of your bathroom evokes certain feelings and sets the mood for your time spent in this intimate room. For example, soothing blues and greens produce a sense of calmness while warm oranges exude excitement. Softer shades like lavender and gray offer elegance and serenity. Light colors maximize the effect of a small bathroom by reflecting it rather than absorbing it.

Bright colors can also enlarge a room by creating the illusion of additional space, especially when used on the ceiling and walls. Lighter greys such as Sherwin-Williams Alabaster (SW 7008) and White Dove (SW 7701-H) are popular choices because they pair nicely with any decor style and won’t date quickly. These neutrals can be paired with other brighter colours in decorative accents or tile designs.

For a more sophisticated feel, consider using darker hues in your space. Sherwin-Williams Naval (SW 6244) creates a cocoon-like feeling and can make a small bathroom feel spacious. When paired with wood and brass fixtures, these rich shades can even add an element of luxury and opulence to your bathroom design.

While light colors are ideal for most bathrooms, it’s important not to shy away from dark shades when decorating a compact space. Dark hues can have a very similar impact to a lighter shade, but they’re often more versatile and can complement any decor theme.

Bold colours can also have a big impact in a small bathroom. Here, a salmon pink is paired with a simple white vanity and sleek fixtures for an airy yet uplifting vibe.

Another way to visually enlarge a bathroom is through the use of tile, floorboards and other surfaces. Using one surface look throughout your bathroom can help reduce visual breaks, making your space feel larger and less fragmented. Having all your tiles, flooring and vanity the same colour isn’t necessary, but having them a close match can make your bathroom feel more unified and expansive. This strategy is especially effective when you’re working with a smaller budget, as you can use inexpensive finishes to create the same effect.

Lighting

Lighting does more than provide visibility; it shapes mood and character, setting the tone for your bathroom’s style. Creating a well-proportioned layered lighting scheme is essential for small spaces. Start with ambient lighting, which is best supplied by a flush-mount or chandelier fixture in the ceiling. Add dimmer switches so that you can adjust the brightness according to the time of day and your mood. Then use task lighting to illuminate the most important areas, like around the vanity mirror. Sconces mounted on either side of the mirror or a bright fixture above it are ideal, as they provide even illumination while minimizing shadows on your face—an essential feature for activities like shaving and applying makeup.

Light colors, reflective surfaces and a minimum of clutter are crucial in a small bathroom. Choosing these design tricks, along with clever layouts and storage solutions, will help your compact space feel bigger visually.

For example, a mirrored medicine cabinet doubles as a vanity with ample storage, while light-colored walls and tiles bounce the natural and artificial light around to make your room appear larger. A narrow, vertical sconce in this bath designed by Gillian Segal serves as an unexpected way to incorporate a stylish, vintage touch into the space.

Removing a tub can free up floor space and create a seamless connection between the shower and the vanity area, which is especially important in smaller bathrooms. This makes it easier to open up the bathroom and provides the opportunity to incorporate a luxurious walk-in shower.

In this bath, a glass door leads directly to the walk-in shower, creating a seamless transition that makes this bathroom feel larger and more spacious. The designer also opted for a large-format porcelain tile to create a sleek, uninterrupted surface. This approach reduces grout lines, which can create visual breaks that make a room feel chopped up and smaller.

Today’s bathrooms are evolving into personal retreats, and smart technology is leading the charge. Incorporating dimmers, motion sensors and tunable LED systems into your small bathroom remodel can transform the space into a real spa. Imagine dimming the lights with a voice command before taking a relaxing bath or having soft, low lighting automatically guide your way during a late-night bathroom run.

Fixtures

When space is tight, even the smallest fixtures have a big impact. From compact sinks to toilets to multi-functional designs, choosing the right fixtures shapes how a bathroom is used and enhances its look and feel.

Light fixtures are one of the most important elements in any bathroom. They can instantly transform the visual size of a room by removing shadows and enhancing clarity. Layered lighting, including vanity lights and recessed sconces, helps create an inviting environment for relaxing and unwinding.

Bulky vanities take up valuable floor space, but a simple swap to a pedestal or floating sink can open the area and make the bathroom feel bigger. Wall-mounted sinks and corner sinks also free up space and offer a clean, minimalist aesthetic. And if storage is essential, try a built-in sink with extra shelving for towels or other necessities.

Mirrors are another vital fixture that can visually expand a room. For a contemporary update, consider a lighted mirror, which features a traditional mirror surrounded by lights—either a single light across the top, two lights on either side, or a halo of illumination all around. Alternatively, opt for a custom-designed recessed medicine cabinet to reduce clutter and save wall space.

Other key fixtures include a clear glass shower door, which allows more light to flow throughout the bathroom, and a sleek ladder to hang towels. Texture plays a huge role in small bathrooms, and unexpected details like a richly gilded mirror, patterned wallpaper, and a slim wooden ladder all elevate the space.

Incorporating plants is another great way to keep a bathroom feeling fresh and inviting. The natural greenery offers a soothing aesthetic and adds moisture to the air, which can help prevent dry skin.

Storage is a big challenge in small bathrooms, and it’s essential to maximize every inch of available space. For a clean, modern look, go for wall-mounted cabinets above the toilet or floating shelves. Built-in cabinets and recessed shelving in the shower are other space-saving options. And when it comes to storage below the sink, opt for a pedestal or wall-mounted rack to eliminate bulky clutter and allow light to shine on surfaces beneath.

Storage

The right storage solutions can transform a tight bathroom into an efficiently organized oasis. By utilizing wall-mounted shelves and compact storage solutions, homeowners can keep toiletries, cosmetics, cleaning supplies, and other daily essentials neatly tucked away and easily accessible, eliminating the stress that comes with searching for that lost toothbrush or running out of face wash. A well-organized space also reduces daily clutter and makes it easier to wipe down surfaces, keeping small bathrooms looking clean and inviting.

Effective organization is the best small bathroom design trick, as it not only keeps essentials at reach but also enables homeowners to remove bulky accessories that rob rooms of their sleek, open appearance. The most popular storage ideas for small bathrooms often employ clever design tricks to maximize space, like angled shelves or recessed cabinets that reveal hidden compartments and reclaim floor space. Other options include tiered shelving that provides a place for frequently used items while relegating less-frequently used items to higher shelves or hidden compartments, as seen in this charming bathroom by interior designer Francesca Grace.

Another key element of an efficient small bathroom is thoughtful placement of cabinetry and fixtures to maximize square footage and create a visually appealing layout. Smart small bathroom remodel ideas often involve swapping bulky fixtures, such as a traditional tub for a walk-in shower, as well as using the latest design trends to open up visual space. For example, floating vanities are popular because they make rooms feel bigger by showing more floors, while microcement-style surfaces and large-format tiles reduce grout lines and make spaces look cleaner.

In addition to maximizing space and creating a stylish aesthetic, the most successful small bathroom design ideas also ensure that the room is comfortable to use. For example, a door that bumps into the toilet is not only awkward but also inefficient, so designers should pay careful attention to where and how doors are placed in small baths. The same goes for window placement and design, as a small bathroom should be easy to navigate while providing adequate elbow room and a sense of privacy.

Navigation